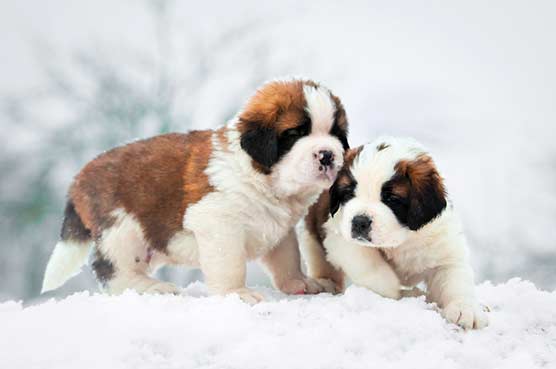
DIY Dog Grooming at Home: The 9-Step Home Grooming Process
Pet grooming costs are rising—and fast. But here’s the good news: you don’t need a groomer (or a grooming degree) to keep your dog clean and comfortable. This guide will walk you through a safe, easy, and vet-approved DIY grooming routine—no fancy tools required.
What You Need Before You Start
Towels (plural—you’ll need backups!)
Mild dog shampoo (avoid human products)
Brush or comb (match to coat type)
Nail clippers or grinder
Dog-safe toothpaste & brush
Ear-cleaning solution
Trimming scissors or clippers (optional)
A non-slip mat for the tub or sink
The 9-Step Home Grooming Process
1. Brushing: The First Step to a Tangle-Free Pup
Brushing isn’t just about keeping your dog’s coat pretty—it’s essential for their skin health and comfort. Regular brushing removes tangles, dirt, loose hair, and even hidden debris like grass seeds or burrs that can cause irritation.
🐾 Why It Matters:
Prevents painful mats and tangles
Stimulates natural oils for a shinier, healthier coat
Helps you spot fleas, bumps, or skin issues early
🧼 Which Brush Should You Use?
Slicker brush—Great for long-haired breeds like Golden Retrievers, Collies, or Huskies. It detangles and de-sheds at the same time.
Bristle brush—Perfect for short-haired dogs like Beagles or Boxers. It removes loose fur and boosts shine.
Pin brush—Good for medium-length, silky coats (think Cocker Spaniels).
🐶 “My husky used to act like brushing was medieval torture—until I started giving her frozen treats during the process. Now she actually enjoys it!”
🕒 How Often?
Long coats— 3–5 times a week
Short coats— 1–2 times a week
Pro Tip: Start brushing from the head and work your way to the tail in gentle strokes. Never yank through a knot—use a detangling spray or gently tease it out with your fingers first.
2. Bathing: Suds Up Without the Stress
Bath time doesn’t have to be a splashy disaster—especially when you know the right way to do it. The goal is to clean your pup without drying out their skin or turning your bathroom into a war zone.
🐾 What You’ll Need:
Lukewarm water (too hot or too cold = unhappy dog)
Gentle, dog-specific shampoo — Human shampoos can mess with your dog’s skin pH
A large cup or handheld sprayer
Towels (yep, more than one)
🚿 How to Do It Right:
Brush first to remove loose fur and prevent tangles from tightening when wet.
Place your dog on a non-slip surface—a bath mat works wonders.
Wet them gently from the neck down. Keep their head, eyes, and ears dry.
Lather shampoo from the shoulders to the tail, massaging gently.
Rinse thoroughly—leftover suds = itchy skin.
Use a washcloth for the face and around the ears (no direct water!).
🐕 “My dog once bolted mid-bath and shook off all the suds onto the living room rug. Lesson: close the bathroom door, always.”
🕒 How Often?
Normal skin: Once every 4–6 weeks
Oily or allergy-prone skin: Follow your vet’s advice
After a mud party in the backyard: Immediately 😅
Pro Tip: A spoonful of peanut butter on the bathtub wall can keep your pup distracted while you scrub!
3. Drying: Fluff Without the Frizz
Drying your dog properly is just as important as the bath itself. Wet fur can lead to chills, skin irritation, or even fungal infections—especially in colder climates or double-coated breeds.
🐾 Step-by-Step Drying:
Towel Dry First
Wrap your pup in a clean towel and gently pat them dry—no vigorous rubbing, especially for curly or long-haired coats (it causes frizz and tangles).Use a Low-Heat Dryer
If your dog tolerates it, use a blow dryer on the lowest heat and speed setting. Keep the dryer at least 6–12 inches away from their skin and constantly move it around to avoid hot spots.
🐕 “My beagle once tried to bite the blow dryer. Now I turn it on across the room for a minute so he gets used to the sound before aiming it at him.”
Air Drying (Only if Warm & Dry Inside)
If your dog has a short coat and the room is warm, air drying is safe—but don’t let them lie on cold floors while damp.
⚠️ Important Safety Tip:
Never use hot air—dogs overheat quickly, and their skin can burn faster than ours.
Pro Tip: Brush your dog again once fully dry to detangle and fluff the coat—it also redistributes natural oils for a healthy shine.
4. Nail Clipping: Snip Without the Slip
Trimming your dog’s nails can be nerve-wracking—but with the right approach, it’s a quick, stress-free routine that keeps paws healthy and floors scratch-free.
🐾 Why It Matters:
Overgrown nails can cause pain, posture issues, and even joint problems.
Long nails are more likely to split, break, or curl into the paw pad (ouch!).
✂️ How to Clip Safely:
Use proper dog nail clippers or a grinder—never human tools.
Hold the paw firmly but gently. Spread the toes so you can see clearly.
Trim just the tip—stop before you reach the pink area inside the nail, known as the quick (this part contains nerves and blood vessels).
If your dog has dark nails, trim little by little—you may notice a chalky white ring before reaching the quick.
🐶 “The first time I clipped too far, I panicked more than my dog. Now I keep styptic powder nearby and go slow—it’s a game changer.”
🆘 If You Hit the Quick:
Stay calm—apply styptic powder or cornstarch with pressure to stop bleeding.
Offer your dog a treat and a break.
🕒 How Often?
Every 3–4 weeks for most dogs. If you hear clicking on the floor, it’s time.
Pro Tip: Desensitize your dog early by handling their paws regularly—even when you’re not trimming. It builds trust and reduces anxiety during grooming.
5. Ear Cleaning: Gentle Care for Healthy Ears
Dogs’ ears are sensitive and prone to buildup—especially in floppy-eared or allergy-prone breeds. Regular ear cleaning helps prevent infections, itchiness, and that unmistakable “dirty dog” smell.
🐾 Why It Matters:
Removes wax, debris, and allergens
Prevents infections caused by moisture or bacteria
Keeps your dog comfortable and itch-free
🧴 How to Clean Ears Safely:
Use a vet-approved ear cleaner—never alcohol, hydrogen peroxide, or homemade solutions unless advised.
Lift the ear flap and gently squeeze the cleaner into the ear canal (follow bottle instructions).
Massage the base of the ear for 20–30 seconds to break up debris—you’ll hear a squishy sound.
Let your dog shake it out (stand back!).
Gently wipe the outer ear and visible inner flap with a soft cloth or cotton pad.
🐕 “My Lab loves ear rubs but hates the cleaner—so I sneak in a gentle massage afterward and all is forgiven.”
⚠️ What Not to Do:
Never use cotton swabs deep inside the ear canal—they can push debris further in or cause injury.
Skip cleaning if your dog has redness, odor, or discharge—see your vet first.
🕒 How Often?
Monthly for most dogs
Weekly or bi-weekly for breeds like Cocker Spaniels, Basset Hounds, or dogs with chronic allergies
Pro Tip: Associate ear cleaning with treats and praise—make it part of a positive grooming routine.
6. Teeth Brushing: Fresh Breath, Healthy Smile
Brushing your dog’s teeth might sound like overkill—but dental disease is one of the most common (and expensive) health issues in dogs. A little brushing goes a long way in preventing tartar buildup, bad breath, and even organ damage caused by gum infections.
🐾 Why It’s Important:
Prevents plaque, tartar, and gum disease
Reduces bad breath
Supports long-term health (dental bacteria can affect the heart, liver, and kidneys)
🪥 How to Brush Like a Pro:
Use a dog-specific toothbrush (or a finger brush for smaller breeds).
Apply a pea-sized amount of enzymatic dog toothpaste—never use human toothpaste, which can be toxic to pets.
Gently lift your dog’s lip and brush in circular motions, focusing on the outer surfaces of the teeth.
Praise your pup constantly—even if you only manage a few seconds at first.
🐶 “When I started brushing my terrier’s teeth, I treated it like a game—now she actually comes running when she sees the brush!”
🕒 How Often?
Ideally daily, but 2–3 times a week still makes a big difference
🦴 Alternative Support:
Dental chews or water additives can help between brushes
Annual dental cleanings by your vet are still recommended
Pro Tip: Start slow—get your dog used to having their mouth touched first, then introduce the brush over time.
7. Fur Trimming: Snip Smart, Stay Safe
Fur trimming can keep your pup looking fresh and feeling cooler—especially around the paws, face, and sanitary areas. While full grooming cuts are best left to the pros, light touch-ups at home are totally doable with patience and the right tools.
✂️ Tools You’ll Need:
Grooming scissors with rounded tips (safety first!)
Comb or slicker brush
Clippers (optional, for confident users)
Treats for positive reinforcement
🐾 Where to Trim:
Around the paws – remove fur that collects dirt or mats
Face and eyes – trim carefully for visibility and hygiene
Sanitary areas – keep clean to prevent irritation
Underarms and belly – only if fur is matted or dragging
🐶 “I once trimmed too close near my poodle’s paw pad—and he refused to walk for an hour out of pure drama. Now I go slow and use a comb as a guard.”
✅ Pro Tips:
Brush first to detangle and spot areas that need trimming
Hold the fur between your fingers and snip below—never cut blind
Start small and take breaks—your dog’s wiggles will test your patience!
⚠️ What to Avoid:
Rushing through it (accidents happen fast)
Cutting mats directly—use a detangler or split them carefully
Trimming too close to sensitive skin without guidance
Pro Tip: If you’re unsure, skip the scissors and book a groomer. A botched cut may take weeks (and a few funny photos) to grow out!
8. De-shedding Techniques: Say Goodbye to Fur Tumbleweeds
If your floors, clothes, and couch look like they’re growing fur, it’s time for some serious de-shedding. Certain breeds—like Huskies, Labs, or German Shepherds—“blow” their coats seasonally, but even short-haired pups can leave a trail behind.
🐾 Why De-shedding Helps:
Reduces loose fur and keeps your home cleaner
Prevents mats in double-coated breeds
Improves air circulation in the coat, helping regulate body temperature
🛠️ Tools of the Trade:
Undercoat rake – Great for thick double coats
De-shedding tool (like a FURminator) – Designed to reach and remove loose undercoat hair
Rubber grooming mitts – Best for short-haired breeds and sensitive areas
🐕 “After my Husky’s spring shed, I had enough hair to knit a second dog. Bath + rake = life saver.”
💦 When to Do It:
Right after a warm bath – Loose hair comes out more easily when the coat is clean and soft
Seasonally – Usually in spring and fall for double-coated breeds
Weekly touch-ups – Keeps shedding manageable
🧼 How to De-shed:
Bathe and towel dry your dog.
Brush normally to remove tangles.
Use a de-shedding tool with gentle, even pressure—avoid going over the same area repeatedly.
Focus on the back, sides, and haunches where shedding is heaviest.
⚠️ Caution:
Don’t over-brush or press too hard—this can irritate the skin
Avoid tools with sharp edges if your dog has sensitive skin
Pro Tip: De-shedding outdoors = less cleanup and a happy squirrel or two with free nesting material 🐿️
9. Comfort & Safety Tips: Keep It Positive, Keep It Safe
Grooming isn’t just about fur and hygiene—it’s about building trust. A calm, happy pup is much easier (and safer) to groom. So let’s make the experience as stress-free as possible—for both of you.
🐶 Comfort First:
Reward often – Treats, praise, and gentle talk go a long way.
Use positive association – Let your dog sniff the tools, sit in the bath dry, or hear the dryer before use.
Take breaks – If your dog starts getting squirmy, stop and try again later.
When I groomed my Golden Retriever the first time, he tried to climb out of the sink mid-soap. Lesson learned: a spoonful of peanut butter smeared on the wall? Magic.
🧠 Know the Signs of Stress:
Excessive panting (even if it’s not hot)
Whining, yawning, or lip licking
Shaking, freezing, or trying to run away
Tail tucked or ears back
If your dog is showing stress, pause and reassure them. Never force through fear—it only makes the next session harder.
⚠️ Safety Musts:
Keep scissors and clippers away from wiggly zones until your dog is calm
Never leave a dog unattended in a tub or on a grooming table
Use non-slip mats in baths and on floors
Always check water temperature before bathing
Pro Tip: Keep sessions short at first—10–15 minutes is enough. Gradually build up as your dog gets more comfortable with the routine.
Common Mistakes to Avoid
Rushing the process
Skipping nail trims
Using human products (they can irritate skin)
Forgetting to check paws and tail for debris
Expert Tips from Vets & Groomers
“Grooming is about consistency. Little and often is better than one big, stressful session.” — Dr. Lisa Kim, DVM
“Desensitize puppies early—it pays off later.” — Jackie, Professional Groomer, Toronto
FAQs
How often should I groom my dog at home?
It depends on breed and coat length—every 4–6 weeks is a safe bet for most.
Can I groom my dog without professional tools?
Absolutely. Start with the basics—good shampoo, a brush, and nail clippers.